Create with Tomi
Come and Create your own Masterpiece
|
|
|
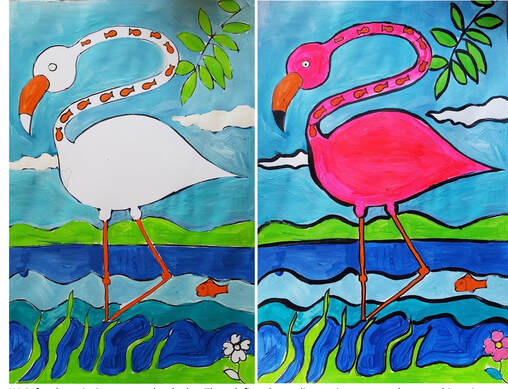
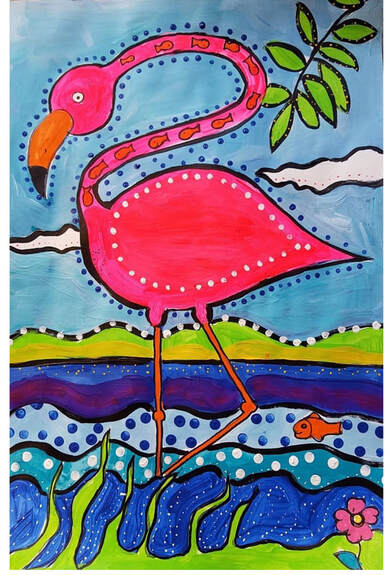
Aboriginal Flamingo
A fun modern spin on Aboriginal art

|
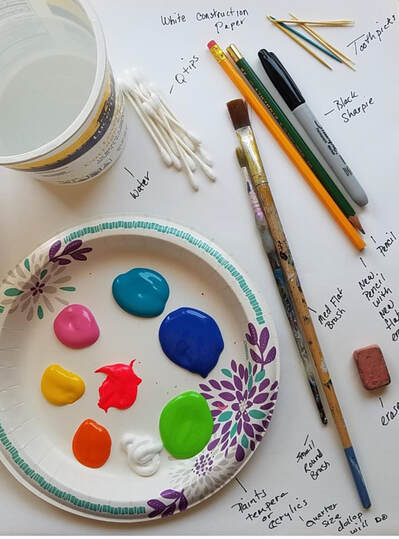
Materials:
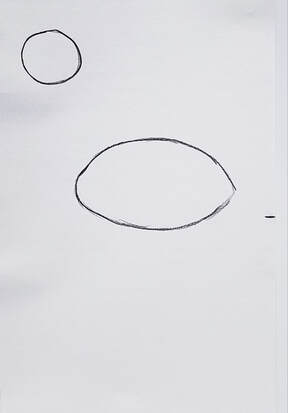
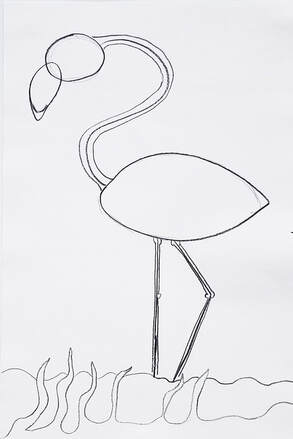
Step 1
|
|
|
|
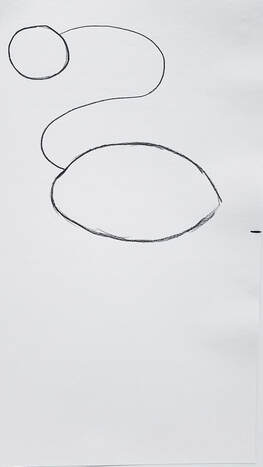
Step 2
|
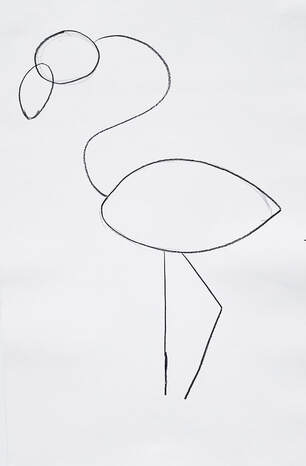
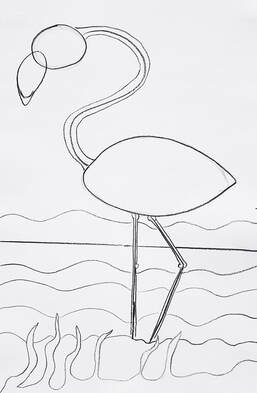
Step 3
|
|
|
|
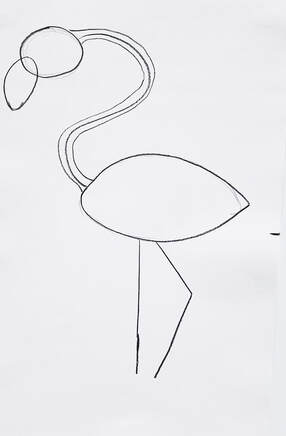
Step 4
|
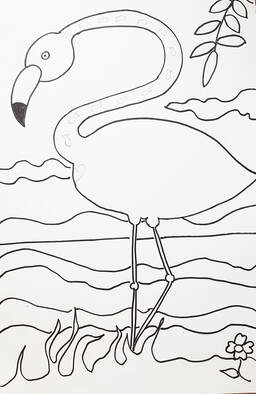
Step 5
|
|
|
|
Step 6
|
Step 7
|
|

|
Step 8
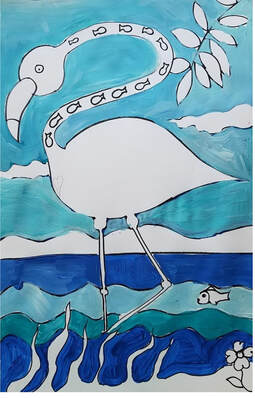
- Use a Sharpie to define the lines.
- Now let’s paint! Begin painting all the parts that are blue. Use several different blues for interest.
- Remember you can mix new colors.
White + blue = Light blue
Green + blue = turquoise or blue green
Black + blue = dark blue - Add some color for the grass and mountain. Mix blue + yellow to make green.
Step 9
- Begin painting all the parts that are warm colors.
- You can mix new these colors.
White + red = pink
Red + yellow = orange - Wait for the painting to completely dry.
- Then define the outlines using your marker or a thin paint brush with black paint.
- If using paint wait for outline to dry before adding dots.
|
Step 10

|
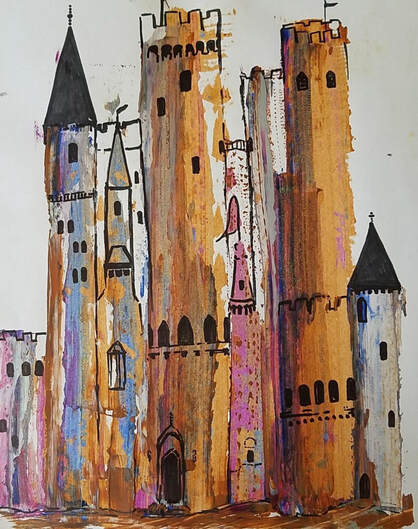
Whimsical Castles

|
|

Materials:
. White paper - construction paper will do
. Palette- a paper plate works well
. Acrylic paints – limit to 3 or 4 colors, plus a metallic paint if desired.
You will only need about a quarter size pour of each color of paint.
. Strips of sturdy cut cardboard or firm paper strips- approx. 3” x 1”
. Black Marker – Sharpie or Bic Marking
. Protective covering for workspace
. Apron or old t-shirt to protect clothing
Steps:
This project was adapted from a Pinterest post. Please visit our B Extraordinaire Pinterest page for more of our artists' work.
. White paper - construction paper will do
. Palette- a paper plate works well
. Acrylic paints – limit to 3 or 4 colors, plus a metallic paint if desired.
You will only need about a quarter size pour of each color of paint.
. Strips of sturdy cut cardboard or firm paper strips- approx. 3” x 1”
. Black Marker – Sharpie or Bic Marking
. Protective covering for workspace
. Apron or old t-shirt to protect clothing
Steps:
- Orient paper to portrait (make it tall)
- Dip the widest part of your cardboard brush into two colors (double load) using a small amount of paint.
- Start at the bottom of your paper and drag your paint upward to make your castle towers. If your tower is not tall enough add more paint and do it again.
- Make multiple towers, stagger the heights for interest. Remember these are whimsical and fun, let them be charming, not perfect.
- Wait for paint to dry before using marker.
- While your paint dries find castle photos for details. Look at the architecture; the windows, the turrets…
- Use black marker to add design elements after the paint is dry. Use your imagination and have fun!
- A little bit of paint is better because you want some white to peek through for texture.
- Speed up the drying process with a hair dryer.
- Make sure paint is dry before using marker. Drawing on your painting while wet may ruin your marker and your painting.
This project was adapted from a Pinterest post. Please visit our B Extraordinaire Pinterest page for more of our artists' work.